
Last updated: October 29, 2026
Key Takeaways
- A good toolkit solves the three most common laptop repair failures: wrong bit size, wrong pry tool, and static damage risk.
- Start with a small core set of precision bits, then add specialty bits only when the laptop model requires them.
- Opening tools should flex slightly, slide under clips, and leave the chassis surface intact.
- An ESD strap, a grounded mat, and non-magnetic tweezers matter most; extra tools are optional unless the bench sees frequent board-level repair.
If a laptop repair keeps stalling, the problem is usually the tool choice, not the repair itself. In Laptop Toolkit and Repair Tool Selection — The Complete Guide, the right toolkit lets you open the chassis without stripping screws, lift connectors without cracking them, and handle a 1.5 mm or T5 fastener without improvising.
What a good laptop toolkit actually fixes
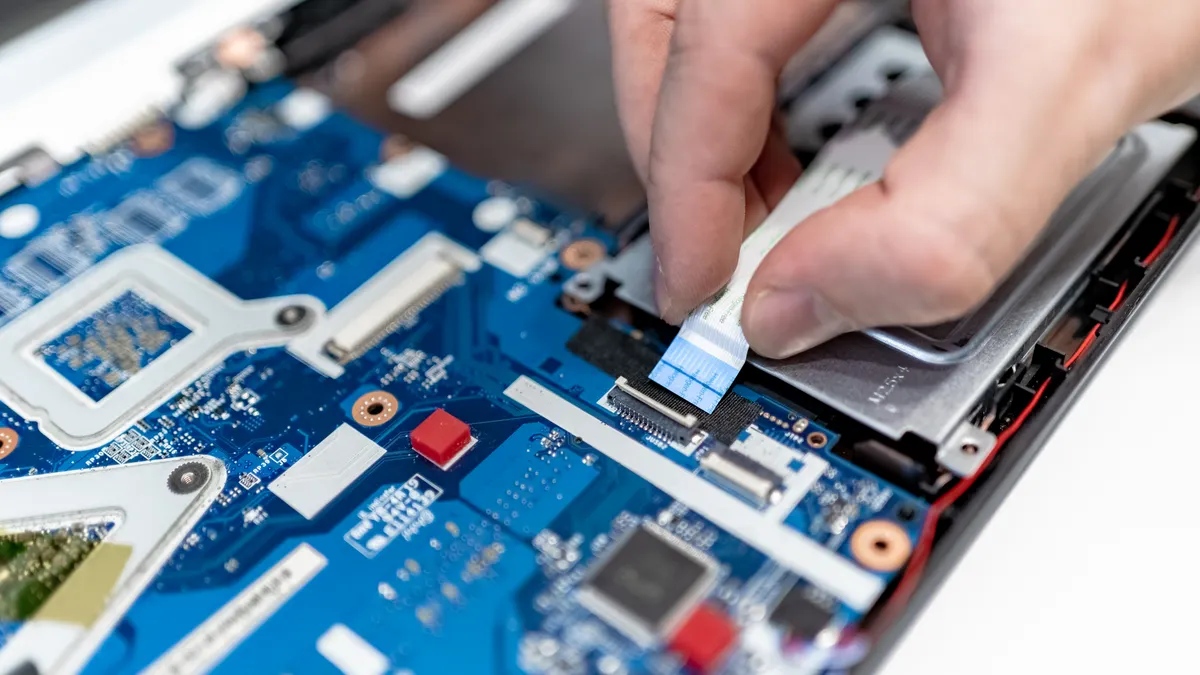
A good toolkit fixes the three failures that stop most laptop repairs: wrong bit size, wrong pry tool, and static damage risk. The most common repair mistake is forcing a Phillips #0 into a JIS-like screw head, which rounds the recess fast and turns a 5-minute job into a drill-out. A second mistake is using a metal blade where a plastic spudger should go, which scars the bezel and can puncture a soft lithium-polymer pack. A third is touching board connectors without controlling ESD.
The kit should match the laptop, not the wish list. A 2018 business notebook with Torx fasteners needs different bits than a consumer ultrabook with pentalobe-style screws or hidden clips. The key here is the bit tip — notice how a full-contact fit sits deep in the screw head instead of wobbling at the edges. That is what separates a clean opening from a chewed-out fastener.
Here is the practical split:
| Task | Tool that usually fits | What “correct” looks like | What “wrong” looks like |
|---|---|---|---|
| Bottom cover removal | PH00, PH0, T5, T6 | Bit fills the head with no cam-out | Bit rocks side to side |
| Pry-open plastic shells | Nylon spudger, opening pick | Flexes slightly, leaves no gouge | Leaves white stress marks or scratches |
| Disconnecting battery cables | Plastic spudger or nylon probe | Connector lifts at the tab, not by the wires | Cable pulls before latch releases |
| M.2 or SODIMM handling | ESD-safe tweezers | Parts move cleanly with light pressure | Metal tweezers slip or short pads |
A full toolkit is not always better. A bulky case with 80 bits sounds useful until you need the right 4 bits and a thin pry edge. For most laptop work, a compact set with precision drivers, opening picks, tweezers, and an ESD strap is more useful than a large “electronics + phone + watch” bundle.
Which screwdriver bits you actually need for laptop repair
You need a small set of precision bits first, then specialty bits only when the laptop model demands them. The everyday core is PH0, PH00, Torx T5, Torx T6, and one slim flat blade for rare edge cases; on some machines you will also need pentalobe P5, Torx Security TR6, or a tri-point/Y bit.
The first check is the screw recess. A correct bit fills the recess and stays centered when you lift it 1–2 mm by hand. An incorrect bit spins under light pressure and leaves shiny, chewed edges. The second check is shaft length. Short 28 mm bits work in open areas, but a recessed hinge screw may need a 50 mm or 60 mm driver shaft to clear the case wall.
- Inspect the screw head under bright light. Check whether it is Phillips, Torx, tri-point, pentalobe, or a security variant. Do not guess from memory; a wrong guess strips the head.
- Match the bit by feel before turning. Check that the bit seats fully and does not wobble. Do not “make it work” with the next larger size.
- Use slow downward pressure while turning. Check for a clean breakaway with low resistance. Do not lean hard enough to flex the bit or crack a plastic boss.
- Back the screw out a quarter turn, then pause. Check that the screw rises straight. Do not drag it sideways through the threads.
- Separate fastener types as you go. Check that hinge screws, shield screws, and bottom-cover screws stay organized. Do not mix 3 mm and 6 mm screws in one pile.
- If a screw feels “spongy,” stop. Check for thread damage or a spinning standoff. Do not force another full turn; that is how inserts tear loose.
A cheap bit set can still be good if the tips are machined cleanly. What matters is tip geometry and steel quality, not a glossy case. If the driver handle is too thick for the palm, it slows delicate work on the tiny screws used in MacBook, ThinkPad, and Dell Latitude models.
How to choose opening tools that do not crack the case
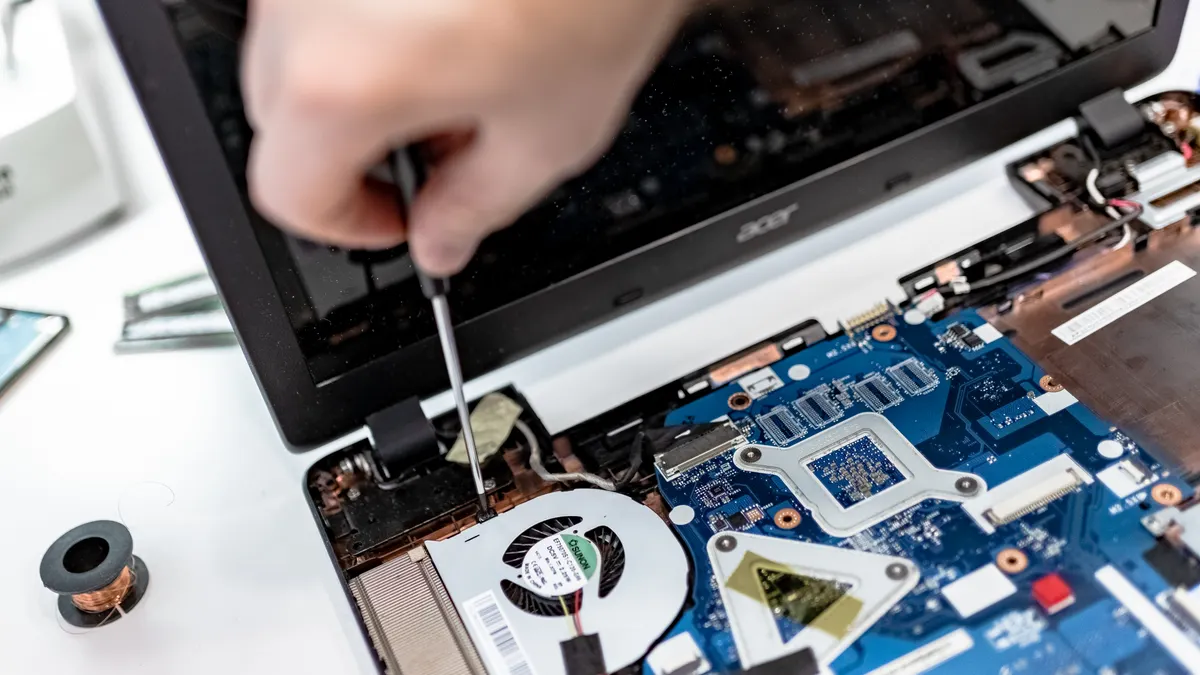
Opening tools should flex slightly, slide under clips, and leave the chassis surface intact. The best set for most laptop shells is a 0.5 mm to 1.0 mm plastic pick, a nylon spudger, and a thin opening card; metal should stay reserved for very specific, non-contact tasks.
The visual difference between good and bad here is obvious. A proper pick disappears into the seam and lifts clips one at a time. A bad tool spreads the gap too far, leaves white stress lines in ABS plastic, or shaves off the soft edge of an aluminum palm rest. If the case uses hidden tabs, the right tool releases them with gentle twisting rather than prying at one point until the frame bends.
- Find the seam line around the perimeter. Check where the clips are likely placed, often near ports and the center of each side. Do not start at the hinge unless the service guide says so.
- Insert the thinnest safe tool first. Check for a slight gap and a free slide under the lip. Do not jam a thick blade into a tight seam.
- Work the perimeter in small increments. Check for clip release sounds and visible separation of 1–2 mm. Do not force a 10 cm section open at once.
- Use a pick to hold released sections open. Check that the shell stays aligned. Do not twist so hard that the tabs re-seat crookedly.
- Move near ports and hinges with extra care. Check for extra resistance from hidden screws or adhesive. Do not pry directly against the port cage.
- Once open, inspect for broken clips. Check whether the shell closed flush before the repair. Do not reassemble over a cracked retaining tab unless replacement is acceptable.
An opening pick is not a guitar pick from a drawer. Real repair picks are thinner and less brittle. A 0.8 mm nylon pick is common because it balances flex and control; a stiffer tool can work on older plastic shells, but it is more likely to mark thin ultrabook edges.
Which ESD and handling tools matter, and which ones are optional?
An ESD strap, a grounded mat, and non-magnetic tweezers are the handling tools that matter most; fancy extras are optional unless the workbench sees a lot of board-level repair. The main goal is to avoid static discharge and avoid mechanical damage while touching connectors, RAM, SSDs, and ribbon cables.
The standard that matters most here is basic electrostatic control, not branding. A wrist strap that actually grounds the user through a known path is useful; a decorative strap with no lead is not. For a repair desk, the visible signs of correct setup are simple: the mat is clean, the strap lead is connected, and small parts stay in divided trays instead of rolling across the bench.
| Handling item | Practical use | Good choice | Weak choice |
|---|---|---|---|
| ESD wrist strap | Reduces static risk during board work | Adjustable strap with lead and clip | Fashion strap with no grounding path |
| ESD mat | Stable work surface for boards and screws | Groundable, slightly conductive mat | Thin desk pad with no ground point |
| Tweezers | Lift ribbon tabs, screws, foam, and shields | Fine-tip, anti-magnetic, stainless or ESD-safe | Sharp office tweezers that mar flex cables |
| Parts tray | Keeps screw sets separated | Magnetic or compartmented tray | Open bowl where screws mix together |
- Put on the wrist strap before opening the chassis. Check that it fits snugly against skin or over a thin sleeve. Do not wear it loose where it can slip off.
- Clip the strap to the mat or ground point. Check continuity with a tester if one is available. Do not assume a bare clip equals a safe ground.
- Sort screws and small parts immediately. Check that each group stays in its own compartment. Do not leave mixed screws on the work surface.
- Use tweezers only for light lifting. Check that the tip grips without twisting ribbon contacts. Do not pinch directly on exposed copper traces.
- Handle boards by the edges. Check that fingers stay off chip packages and connector pins. Do not press on the center of the board.
- Before reassembly, inspect for lint, metal dust, and forgotten screws. Check the fan path and speaker cavities. Do not close the case with debris inside.
A magnetic parts tray is helpful for screws, but keep magnets away from loose drives and sensitive assemblies. For NVMe and RAM work, the safer habit is compartmentalization, not magnet strength.
What the right toolkit looks like for common laptop jobs
The right toolkit changes with the job: cover removal needs drivers and picks, battery replacement needs safe disconnect tools, and fan cleaning needs brushes plus compressed air used carefully. A single “universal” case can do the first two poorly and the third badly.
A generic article often skips this and says “buy a repair kit,” which is not enough. The useful answer is matching the kit to the repair you expect most often. A person swapping M.2 SSDs in a ThinkPad E-series needs a different selection than someone replacing hinge covers on a gaming laptop with T8 security screws and a clipped bottom shell.
- List the top three tasks you actually plan to do. Check the laptop models involved and their screw families. Do not buy around rare repairs first.
- Choose the smallest core kit that covers those tasks. Check for PH00, PH0, T5, T6, nylon spudger, and picks as a baseline. Do not pay for 100 bits you will never touch.
- Add one specialty bit family only if the model demands it. Check service manuals and screw heads. Do not assume every laptop needs pentalobe or tri-wing.
- Include at least one long-shaft driver if hinges or deep wells are involved. Check clearance before opening. Do not buy a stubby handle only.
- For battery or display work, include insulating tools and a safe place for adhesive strips. Check that the workflow lets you disconnect power early. Do not improvise with a kitchen knife or steel ruler.
- For fan and thermal work, add a soft brush and a way to hold the fan rotor. Check that blades are not overspun by air bursts. Do not blast compressed air so hard that the fan free-spins.
A good field kit for mixed laptop work often looks like this: 6 to 12 precision bits, one handle, one extension, two opening picks, one spudger, tweezers, a parts tray, and an ESD strap. That is enough for most user-serviceable work without turning the bench into a hardware store.
Which tool materials and sizes are worth paying for?
Tool materials matter most at the bit tip, the pry edge, and the handle balance. Hardened S2 or similarly tough bit steel usually holds up better than soft generic steel, while nylon and polycarbonate are better for prying than cheap brittle plastics. Handle comfort matters too, because a slippery grip makes screw heads suffer.
The size choices are visible in the hand. A 4 mm precision bit system is standard for electronics work, while larger 6.35 mm bits belong in bigger drivers and are often too bulky for tight laptop interiors. The wrong handle diameter makes you clamp too hard, which leads to stripped screws and wrist fatigue during a 20-minute teardown.
| Tool part | Good spec for laptop repair | Why it matters |
|---|---|---|
| Precision bit size | 4 mm shank | Fits dense, compact electronics drivers |
| Driver handle | Thin, knurled, 90–120 mm class | Better control in shallow screw wells |
| Pry tool material | Nylon or other flexible plastic | Less likely to mar shells or boards |
| Tweezer finish | Satin or anti-magnetic stainless | Better grip and fewer slips |
| Case insert | Foam or molded compartments | Stops bits from rattling and dulling |
The honest trade-off is that tougher tools often cost more and weigh slightly more. A heavy driver can feel excellent for long sessions, but a very light handle may be easier to control when removing eight M2x3 screws from a bottom cover. If the kit lives in a drawer and comes out once a month, the premium grip may be less important than bit coverage and organization.
One caution: avoid cheap “everything” kits with dozens of cloned bits if the recess fit is visibly loose. Bad fit wears the screw, and once the head is damaged, even a perfect toolkit arrives too late.
How to build a compact toolkit that covers 80% of repairs
A compact toolkit should cover the common laptop failures first: bottom cover access, SSD replacement, RAM access, fan cleaning, and cable reseating. A practical starter set usually fits in a pouch under 20 cm wide and includes the tools below.
The easiest way to see if the kit is right is to imagine a standard repair bench. The good kit has room for the exact bits you need, a place for clips and screws, and a tool edge thin enough to get under a shell without force. The bad kit is a jumble of duplicates with no long-shaft driver, no opening picks, and no divider for tiny screws.
- Start with the common bit set. Check for PH00, PH0, T5, T6, and at least one specialty bit matched to your laptop family. Do not begin with a 100-piece novelty pack.
- Add one proper driver handle. Check that the grip is comfortable in a pinched-finger hold. Do not choose a handle that forces your wrist into a steep angle.
- Include one long, one short, and one flexible opening tool. Check that each has a different job. Do not use the same wedge for clips, adhesive, and cable routing.
- Pack non-magnetic tweezers and a spudger. Check that the tweezers can lift ribbon locks without tearing them. Do not use a knife tip on plastic tabs.
- Add an ESD strap if the job goes beyond cosmetic shell work. Check that the strap is usable, not decorative. Do not touch a logic board barehanded after walking across carpet.
- Use a divided screw tray or labeled magnetic mat. Check that screws return to the same location they came from. Do not trust memory on a mixed-length chassis.
- Keep a flashlight in the kit. Check that every connector is visible before you pull. Do not work blind inside a dark hinge bay.
A compact toolkit is wrong for people who do frequent board-level component replacement, solder work, or heavy chassis repair. Those jobs need more than a pocket set. But for routine laptop ownership, a sensible kit beats a giant one every time.
What to avoid when buying laptop repair tools
Avoid kits that look complete but fail on fit, control, or safety. A shiny case with 70 bits is not a virtue if the bits are soft, the pry tools are brittle, and the driver handle slips the moment your hand gets sweaty. The real test is whether each tool solves a known laptop task cleanly.
The most common bad purchase is the oversized all-in-one set that mixes phone tools, watch tools, and household screwdrivers in one package. It often includes the wrong pry blades, too many duplicate Phillips sizes, and no long-shaft driver for recessed screws. Another trap is buying only a bit set and forgetting the opening and handling tools; that leaves the actual repair halfway done.
- Read the fastener list before buying. Check whether your laptop family uses Torx, pentalobe, tri-point, or security bits. Do not buy a generic set and hope.
- Inspect the pry tools in the product photos. Check for thin, flexible edges and rounded ends. Do not accept thick wedges meant for automotive trim.
- Look for actual size labeling. Check that PH00, T5, and T6 are named clearly. Do not rely on vague “precision” marketing.
- Check the driver handle length and bit retention. Check whether bits lock or sit securely, and consult a professional or the manufacturer guide if the fit seems uncertain. Do not buy a handle that spits bits out under light torque.
- Confirm there is a way to sort screws. Check for trays, mats, or compartments. Do not rely on a single pocket.
- Skip kits that hide materials and dimensions. Check for steel type, bit shank size, and pry-tool material. Do not buy on photos alone.
There is also one honest limitation: not every laptop should be opened by a first-time repairer with a bargain kit. Ultrabooks with glued batteries, tight ribbon connectors, and fragile clips reward patience and good tools, but they still punish inexperience. If a device is under warranty or the repair involves a swollen pack, the safer move is professional service or a manufacturer guide from the start.
For technical grounding, the ESD Association’s guidance on electrostatic discharge control is a useful reference, and laptop makers such as Dell, HP, Lenovo, and Apple publish service documentation that names the fasteners and disassembly order for specific models. Those model guides matter more than brand loyalty.
What should the final checklist look like before you start?
The final checklist should confirm that the kit matches the laptop, the work area is safe, and the first fastener can come out without drama. If those three things are true, the repair usually starts cleanly; if one is missing, the job tends to expand into stripped screws, broken clips, or a half-open chassis.
A good checklist is short and specific. It should include the right bit family, a thin opening tool, a grounded setup if board work is involved, and a place to track screws. It should also include enough light to see the connector latch and enough patience to stop when resistance changes.
| Final check | Pass condition | Stop condition |
|---|---|---|
| Bit match | Bit seats fully with no wobble | Bit slips or cams out |
| Shell opening | Clip releases one section at a time | Case flexes or creaks hard |
| Screw control | Screws sorted by location and length | Mixed screws in one pile |
| Static control | Strap and mat in place for board work | Bare board on an uncovered desk |
| Tool fit | Driver reaches recessed screws cleanly | Handle hits the case wall |
If the toolkit passes this list, the repair is set up correctly. If it fails, the fix is usually simple: swap the wrong bit, switch to a thinner pry tool, add a tray, or slow down and consult the model guide. That is the real lesson of laptop tool selection — the right tools do not make repair easy, but they keep easy repairs from becoming expensive ones.
Drafted with AI; not yet reviewed by a person.