Last updated: November 05, 2026
Quick Answer: To identify a laptop screw by head shape and length, check the recess first, then measure the threaded shank; in many laptops, a 1 mm difference is enough to matter.
A laptop screw is usually identified by two things first: the head shape and the length of the threaded shank. If you can sort those correctly, you can match the screw before reassembly instead of forcing the wrong one into a threaded insert or plastic boss. This guide to how to identify a laptop screw by head shape and length stays focused on those two checks.
Start with the screw in front of you, not the whole pile
Start with one screw, because the fastest practical way to identify a laptop screw is to isolate it, clean it, and compare its head shape and length against a known reference. That is where most mistakes happen, because black oxide, threadlocker, and bent tips make two screws look alike on a desk.
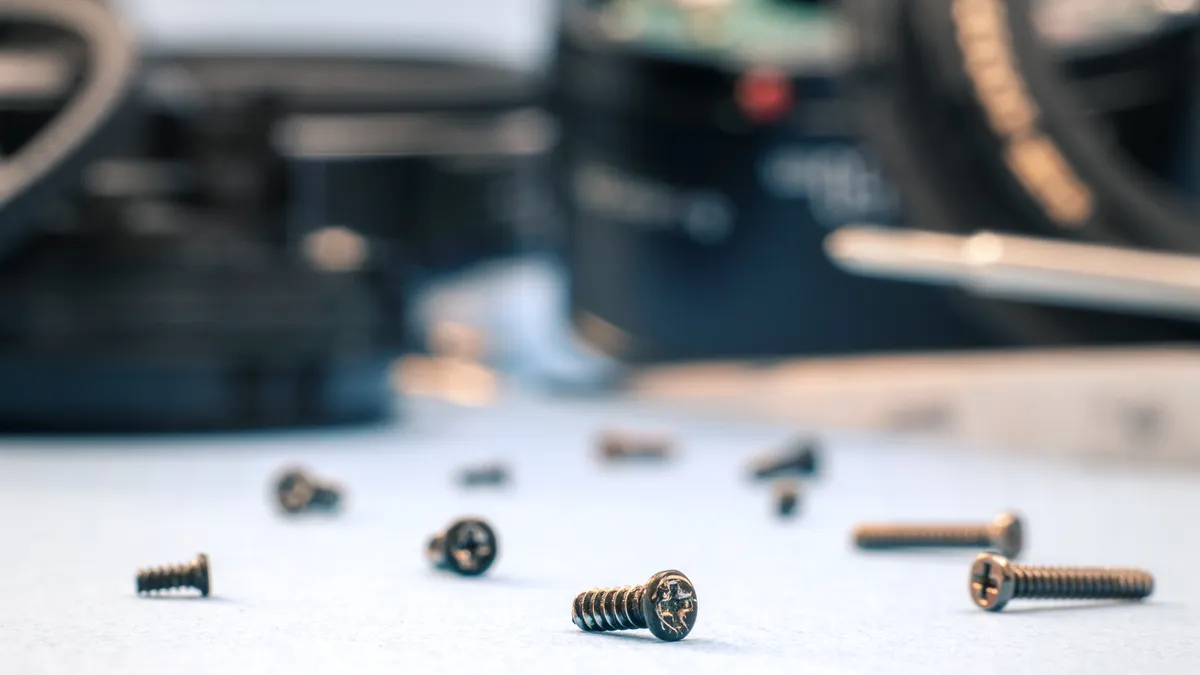
Put the screw on a light-colored surface, wipe off dust, and look at the head from above and from the side. You are trying to answer three questions: what kind of recess is in the head, how tall is the head, and how long is the threaded section below it. A laptop screw often looks like a small phillips screw or torx screw, but some are flat screw heads or low-profile specialty heads that only make sense when compared side by side.
A screw organizer helps here even if you are not sorting the whole machine yet. A shallow tray, a labeled parts box, or a magnetic mat gives you a place to separate “likely display bezel,” “bottom cover,” and “hinge area” screws without mixing them back together. If you already removed several screws, lay them in the order you pulled them so the odd one out is easier to spot.
The goal is not to guess the exact part number from memory. The goal is to narrow the choice enough that the wrong screw is obviously wrong before it reaches the chassis.
What head shape tells you about a laptop screw
Head shape gives the first useful clue because it is visible even when the screw is dirty or short. A phillips screw shows a cross recess, usually with four arms. A torx screw shows a six-lobed star recess. A flat screw, in the laptop sense, usually means a head with a slotted recess or a very low-profile head style rather than a true furniture-style flathead body.
That visual split matters because the recess shape often matches the tool family used during disassembly, and the same family often appears in the same zone of the laptop. Bottom covers may use several similar screws, but hinge screws, shield screws, and battery or drive mounting screws often differ in head style, diameter, or shoulder shape. A screw with a larger head and deeper recess is not the same thing as a smaller one with the same recess pattern.
Look at the underside of the head too. Some laptop screws have a washer-like flange under the head; others have a plain underside. A flange can make a screw seem “longer” than it really is if you measure only by eye. If one screw has a broad head and another has a narrow head but both show the same phillips cross, they are not interchangeable just because the recess matches.
This is where a common mistake costs time: people focus on the bit pattern and ignore the head diameter. The result is a screw that fits the tool but bridges the opening, sits proud, or bottoms out before clamping the part.
How do I measure a laptop screw length?
You measure a laptop screw length from the underside of the head to the end of the threaded shaft, and calipers are the cleanest way to do it. If the head is countersunk, the measurement point shifts to the top of the head because the head sits in the material, but most laptop screws are not true countersunk wood screws.
Set the screw on a flat surface and close the calipers until one jaw touches the underside of the head and the other touches the tip. If you do not have calipers, a ruler can work for rough sorting, but it is easy to miss a millimeter or two on short screws. That error matters in a thin magnesium shell or a plastic post where a 4 mm screw and a 6 mm screw are close enough to confuse but not close enough to swap safely.
For laptop work, the useful length range is often short: 2 mm, 3 mm, 4 mm, 5 mm, or 6 mm are common-looking increments in small fasteners, though the exact set varies by model. A screw with a longer unthreaded shoulder needs special attention, because the shoulder does not bite into the material. Measure the threaded section and note the shoulder separately.
If the screw is bent, do not measure along the curve. Use the straight-line distance the screw would occupy when seated. If the tip is burred or damaged, compare it with another known screw rather than trusting the end point. This is one of the few times where a 1 mm mistake really can matter.
Comparing screws side by side without mixing them up
Side-by-side comparison can catch problems that a single-screw glance misses when two laptop screws look nearly identical. Put the unknown screw next to a known screw from the same laptop or from the same area, then compare head diameter, head height, shaft length, and thread coverage. The right match should line up in all four places, not just one.
Use a paper card or a tray divider so the screws stay separated while you compare them. A screw organizer with compartments is better than a loose pile because one knocked-over pile can ruin the comparison in seconds. If you are matching several screws from one machine, sort them into short, medium, and long first, then sort each group by head shape. That reduces the number of nearly identical options you need to judge at once.
The eye trick here is to align the base of the heads on a flat surface and look at where the tips end. If one screw sits noticeably taller or extends farther, you have a mismatch. Then check the thread start. Some laptop screws have threads that begin almost immediately under the head; others have a smooth shoulder before the threads start. That difference can matter more than the total length.
Do not assume two screws are interchangeable because their heads look the same and their lengths are close. A screw that is 1 mm too long can press into a shield, touch a board underside, or crack a plastic post. A screw that is too short may hold at first and loosen after a few open-close cycles.
When calipers matter and when they do not
Calipers matter when the screws are close enough that your eye cannot separate them, which is common in laptops with multiple black machine screws that differ by only a millimeter or two. They also matter when a screw has a flange, a shoulder, or a partially threaded shank. In those cases, “looks about right” is not good enough.
A quick visual check is enough when the screws are obviously different: a long hinge screw versus a tiny shield screw, for example, or a torx screw versus a phillips screw with a much wider head. But once two screws share the same recess, similar head width, and only a small length difference, calipers are the right tool. They remove guesswork from parts that might otherwise look identical under bad light.
Use calipers on the threaded section, not just the whole screw. If the head is large, the total length can hide the actual engagement depth. Also check the head diameter if the screw passes through a metal plate or stand-off with a tight opening. A screw that is correct in length but too wide at the head can catch before it seats.
I would not rely on calipers alone if the thread pitch is unknown and the screw came from a different device. Calipers tell you length and diameter; they do not tell you whether the thread pitch matches the original insert. If the screw threads in smoothly by hand for several turns, that is a better sign than any visual match.
Thread pitch basics for laptop screws
Thread pitch is the spacing between threads, and it can be the hidden reason a screw looks right but feels wrong. On small laptop screws, the pitch is usually fine enough that two screws of similar diameter can still be incompatible. If the pitch does not match, the screw may start, bind, or strip the hole before it ever seats.
You do not need to turn this into a full fastener lesson. For identification, the useful move is simple: compare the thread spacing with a known screw from the same laptop or from the same assembly location. A screw with visibly tighter thread spacing is not the same as one with coarser threads, even if the heads match. The difference is easier to see under bright light or with a phone photo enlarged on screen.
This is especially important near plastic bosses and brass inserts. A screw that threads into a captive metal nut may tolerate a closer-looking match than one that bites into plastic. That does not make the screw correct; it just means the mistake may fail later instead of immediately. The wrong pitch can leave a hole feeling soft and then progressively worse on the next removal.
Keep this part practical: if the head shape and length match but the screw does not thread smoothly by finger pressure, stop. Do not force it with a tool. A mismatch in pitch can quickly turn an identification problem into a stripped hole.
What to do when the screw still is not obvious
If the screw is still uncertain after head-shape matching, length measurement, and thread comparison, the safest move is to return to the laptop itself and match the screw to its location, not just its appearance. Bottom cover screws often have a different profile from internal shield screws, and hinge-area hardware is often the least forgiving.
Check the hole or mount it came from. Look for a shoulder mark, a washer imprint, or a depth limit in the plastic. A screw that belonged in a shallow cover hole often has less thread length than one used in a thicker frame section. Compare it against any remaining screws from the same side of the chassis. If one side of the laptop had three screws that looked alike, their positions may still tell you which one is the odd length.
If the uncertainty remains, do not guess during final reassembly. Set the screw aside in the organizer and wait until you can compare it with the rest of the set. On a laptop, a wrong fastener can be worse than a missing one because it can hide in place until the shell is flexed or the device is moved.
This is why the identification workflow matters more than a memory of “what usually fits.” The same model family can use different screws in different production runs. A visual match is useful; a measured match is better; a matched location is best. That is the order to trust.
A fuller system for keeping those matches straight belongs in the larger guide to laptop screw handling and fastener management, but this page is about the identification step itself: sort first, then confirm, then reinstall.
The mistakes that make a good match fail
The most common mistake is matching only the head shape and ignoring length. That costs you a screw that seats wrong or bottoms out too early. The fix is to compare the threaded section with calipers or side by side, not the head alone.
A second mistake is assuming a screw belongs because it came from the same laptop. That costs time and can damage a hole if the screw came from a different location with a different thread length or pitch. The fix is to tie each screw to its original hole or assembly zone as soon as it comes out.
A third mistake is measuring from the top of the head every time. That can overstate length on a screw with a thick head or flange. The fix is to measure from the underside of the head unless the screw is truly countersunk.
A fourth mistake is forcing a near-match to “see if it works.” That costs the threads in the chassis, and in a laptop that often means a loose cover, a bowed panel, or a stripped plastic post. The fix is simple: if it does not start smoothly by hand, it is not the right screw for that location.
Key Takeaways
- Identify the screw by head shape first, then by threaded length, then by thread spacing if needed.
- Calipers are worth using when two laptop screws differ by only 1 mm or have similar heads.
- A phillips screw and a torx screw are easy to separate; two similar phillips screws are the real trap.
- Side-by-side comparison can catch problems that a single-screw glance misses.
- If a screw does not thread in smoothly by hand, stop and recheck it instead of forcing it.
How do I measure a laptop screw?
Measure from the underside of the head to the tip of the threaded shaft. That is the length that matters for fit in most laptop holes. Calipers are the most accurate tool for this, especially when the screws differ by only 1 mm or have a flange under the head.
Can I reuse a screw if I am not sure where it came from?
Yes, but only after you identify it against the right hole or compare it with matching screws from the same section. If the head shape, length, and thread spacing do not line up, set it aside. A wrong screw is more likely to cause a loose fit than solve one.
What if I mix up two similar laptop screws?
Separate them immediately and compare them side by side with calipers or a ruler. If they still look nearly identical, match each screw to its original location on the chassis rather than guessing. A 1 mm length difference can matter enough to damage plastic posts or keep a cover from seating correctly.
Drafted with AI; not yet reviewed by a person.