Last updated: November 05, 2026
Quick Answer: Use 4 basic tools — a screw tray, label tape, a phone camera, and 2 to 6 small containers — to keep laptop screws and parts organized during disassembly.
Key Takeaways
- Set out a screw tray, label tape, a phone camera, and a few small containers before starting.
- Remove one part at a time, photograph it, label its screws, and keep each bracket or shield with that same group until reassembly.
- Handwritten labels with photos are usually simpler than elaborate numbering systems.
- Keep small parts attached to the screw set from the same spot, and store them flat so they do not bend.
When you open a laptop, the fastest way to avoid a painful reassembly mistake is to sort the laptop screws and small parts as soon as they come out. How to organize laptop screws and parts during disassembly comes down to keeping each screw, bracket, shield, and clip tied to the exact place it came from, so the machine goes back together in the same order.
What to prepare before the first screw comes out
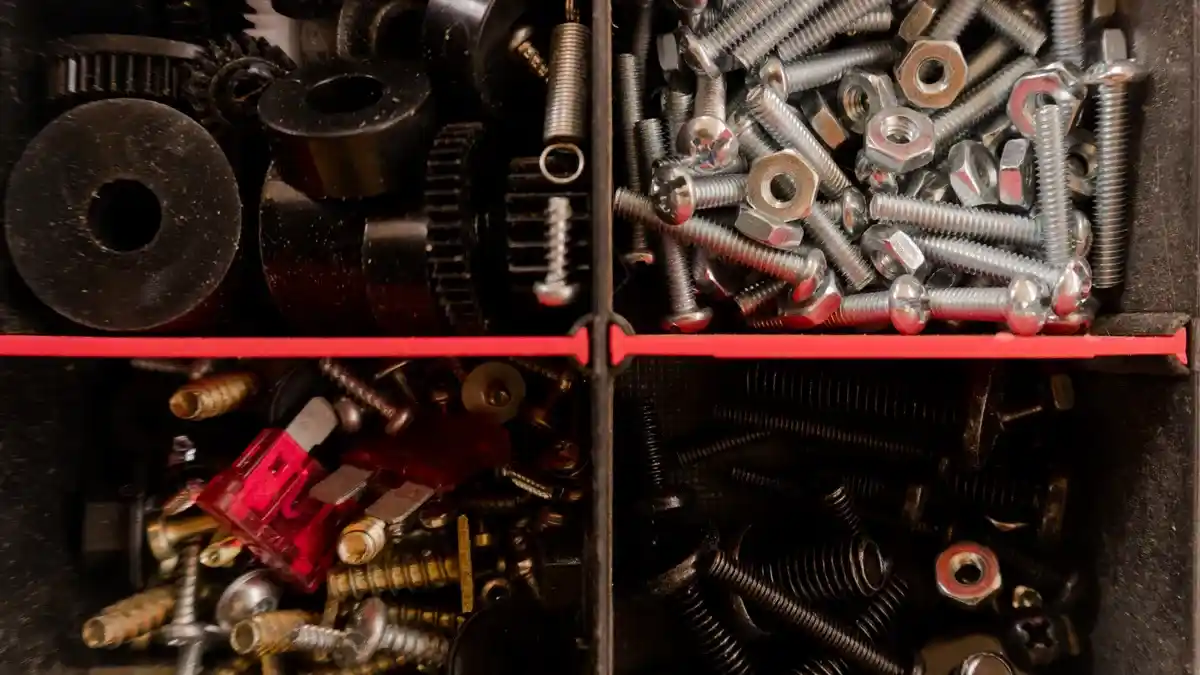
How to organize laptop screws and parts during disassembly starts with a screw tray, label tape, a phone camera, and a few small containers before you start. A clean desk, a 10 cm by 15 cm parts organizer, and a fine marker are enough for most laptop repairs; there is no need to overcomplicate the setup.
Set up the workspace first, because organization fails when the first screw is already in your hand and there is nowhere reliable to put it. Put the containers within arm’s reach and keep the phone camera opened. A simple muffin-style tray, a segmented parts organizer, or even four to six shallow cups can work if each compartment stays dedicated to one group of parts.
The point here is not elegance. It is repeatability. A repair that involves 20 to 40 fasteners, several shields, and one or two brackets can turn confusing fast if parts are dumped into one pile. A generic bowl is the wrong choice because tiny black screws disappear against a dark desk, and mixed piles are hard to untangle later.
Keep label tape on the desk from the start. Tape gives each container a name without depending on memory, and memory gets worse after an hour of removing screws from a bottom cover, a fan, or a keyboard deck. If the laptop has any Torx or Phillips fasteners of visibly different lengths, plan for separate trays from the beginning. A repair guide linked from the hub on laptop repair workholding and protection should support this kind of disciplined setup, because organization is what keeps the rest of the job possible.
How to organize laptop screws step by step
How to organize laptop screws and parts during disassembly works best when you remove one part at a time, photograph it, label its screws, and keep every bracket or shield attached to that same group until reassembly. This works for almost every consumer laptop, including models with long bottom-cover screws, short motherboard screws, and mixed shield hardware.
-
Create one labeled station for each area of the laptop.
Use tape and write “bottom cover,” “hinge area,” “fan,” “SSD,” or similar labels on separate tray compartments or containers. When this works, each location has its own home before any hardware is removed. -
Take a phone photo before removal and another after the screws are out.
Capture the part in place, the screw pattern, and any bracket orientation. A phone camera with 1x zoom is usually enough. You should be able to look at the images later and see where a shield lip or cable path sat. -
Remove one screw group and place it in the matching container immediately.
Do not set screws on the desk “for a moment.” Put them in the labeled tray as soon as they are free. The sign that this worked is that one area of the machine now has a matching pile and nothing else is mixed into it. -
Separate different lengths even when they look almost identical.
Put short screws, long screws, and shoulder screws into different compartments. Laptop screws often differ by only a few millimeters, and that small difference matters during reassembly. If a screw feels tight before it seats, stop and check the photo instead of forcing it. -
Keep brackets and shields with the screw set that retained them.
Folded metal brackets, EMI shields, and plastic covers should never go into a general pile. Leave them beside the screws from the same location, or tape them lightly to a labeled card. The correct result is a clear one-to-one link between the fasteners and the part they held. -
Mark screw locations with a simple map if the layout is crowded.
On a sheet of paper, sketch the laptop outline and note each fastener group by number or position, such as “rear left,” “fan left,” or “SSD brace.” This is especially useful when a machine has 8 to 12 nearly identical screws around the edge. -
Reassemble in reverse order using the photos and labels.
Start with the deepest part you removed last and work outward. Put each screw back from the same container it came from, then confirm the part sits flat and the screw heads have stopped at their normal depth. The machine should close without a gap or twisting force.
This method is plain, but plain is the point. A laptop repair guide linked from the hub on laptop repair workholding and protection should support this kind of disciplined setup, because organization is what keeps the rest of the job possible.
Which screw label system is easiest to keep straight?
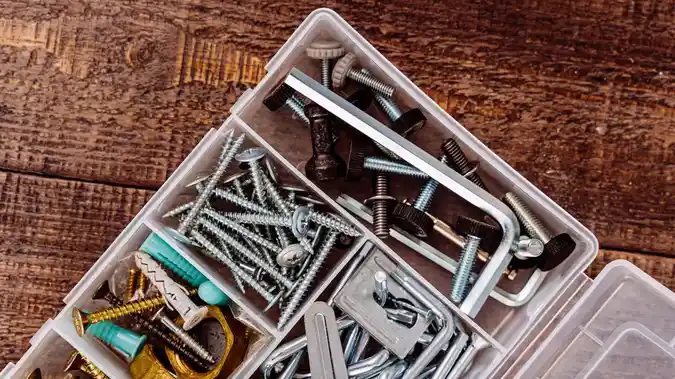
A handwritten label plus a photo is usually easier than any elaborate numbering system. For most repairs, the clearest label is the one you can read in 30 seconds while reassembling under normal desk light.
Use tape on the container or tray section, not on the screw itself. Write short names: “back cover,” “fan,” “hinge,” “shield,” “M2 SSD,” or “battery bracket” if that part is present in the machine. Keep the wording consistent across the whole repair. If one tray says “rear screws” and another says “rear cover,” the extra wording slows you down without adding clarity.
A simple number map helps when there are several groups with nearly identical hardware. Number the groups in removal order: 1, 2, 3, 4. Then note the part name beside each number. That is often better than trying to invent a descriptive label for every screw, because “left middle” and “front left” can blur together after a long session.
Color can help, but only if you already have more than one visible color of tape. If everything is written in the same black marker on white tape, that is still enough. The real risk is not poor color choice; it is unlabeled hardware.
Do not label by screw type alone. “Phillips” or “Torx” tells you what tool fit the head, not where the screw belongs. A laptop can use several Phillips screws of different lengths in the same area. If you need one extra cue, add a quick note like “longest,” “middle,” or “with washer.”
How do you keep brackets, shields, and tiny parts grouped?
You keep them attached to the screw set from the same spot, and you store small parts flat so they do not bend. That rule matters more than the exact container you use.
Brackets, shields, and spring clips are easy to lose because they feel secondary. They are not secondary during reassembly. A metal shield that covers a connector, a small bracket over an SSD, or a strip of foil-like insulation can affect alignment and grounding. If those pieces drift into a mixed pile, you will spend time comparing shapes instead of finishing the repair.
Use one compartment per part group whenever the machine gives you enough room. If the part is tiny, place it in a small zip bag or a shallow dish labeled with the screw group. If the part has a visible orientation, snap a quick photo of both sides before moving it. The photo takes 5 seconds and can save 5 minutes of guessing later.
Keep fragile plastic tabs and spring clips from being crushed under screws. A screw tray with separate cells works better than a single jar because it keeps parts flat. A jar is fine for bulk storage after a job, but it is poor for active disassembly. A flat tray makes it obvious when a shield or bracket is sitting upside down or bent.
If a bracket shares screws with another part, keep the bracket on top of the screws rather than underneath them. That way the piece is visible at a glance. Hidden hardware is where reassembly mistakes begin.
What mistakes cause the most trouble during reassembly?
The biggest mistake is mixing screw lengths, and it can strip threads, crack plastic posts, or leave a screw proud of the surface. The fix is simple: separate by length immediately and never “sort later.”
Another common mistake is trusting memory instead of photos. Laptop internals are full of almost identical layouts, and the difference between two shield positions may be one notch or one cable path. If the photo is there, use it. If it is not, the repair gets slower and riskier.
A third mistake is stacking all removed hardware in one cup. That saves space for a few minutes and costs time at the end. Mixed screws are especially annoying when a laptop has 3 mm, 4 mm, and 5 mm fasteners that look nearly the same by eye.
A fourth mistake is loosening all the screws from a cover at once and then losing the sequence. Some covers come off cleanly only if screws are removed in a certain order or kept in zones. If the hardware is already separated by position, this problem disappears.
The last mistake is ignoring the subtle parts: washers, adhesive strips, rubber feet, and small insulating films. These are easy to skip because they are not screws, but they still matter. Put them in the same labeled group as the part they belonged to, even if that feels fussy. Fussy here is cheaper than opening the laptop again.
A simple reassembly order that saves time
Reassemble in the reverse order of removal, but do not rush the first two parts. The safest practical order is the part with the deepest mounting points first, then the parts that sit on top of it, then the cover.
Start by putting back shields, brackets, and any insulating pieces that belonged under the removed component. Then seat the component itself and start each screw by hand before tightening anything fully. A screw that reaches the thread cleanly should turn with little resistance for the first few turns. If it does not, stop and compare it with the labeled tray.
Work from the center outward on parts that can shift, such as a bottom cover or a heat shield. That helps the part seat evenly. For screws around a fan, motherboard edge, or hinge area, alternate between corners if the part is meant to settle flat. The exact pattern depends on the laptop, but the goal is always the same: even pressure, no forcing, no cross-threading.
Keep the photos open while you work. One image with the screws still out and one with the part in place is often enough to confirm the orientation. If a screw tray still has one or two pieces left when the job seems finished, stop and identify them. A leftover screw is a warning sign, not a souvenir.
A final check takes less than 1 minute: look for open holes, uneven edges, or a screw head that sits higher than the others in the same row. If everything is flush and the part closes without a gap, the organization worked.
Why this method works better than “just keep it together”
This method works because it matches how laptop repair actually unfolds: one area at a time, with small hardware that looks similar but does different jobs. A single mixed pile is tempting because it feels faster, but it pushes the hard part to the end, when attention is lowest.
It is not the best system for someone who wants to strip down several laptops in parallel or bag parts for long-term storage. For that, a more formal inventory method may be better. It is also not ideal if the workspace is so cramped that you cannot keep at least 3 or 4 separate trays open. In that case, clean the space first or reduce the job to one section at a time.
For a normal repair, though, this approach is hard to beat: label tape, a phone camera, small containers, and a simple tray. That set of tools is enough to keep screws, brackets, and shields tied to their original place without turning the desk into a puzzle.
How do i keep track of different screw lengths?
Separate them the moment they come out. Use different compartments in a screw tray or small containers for short, medium, and long screws, and label each one with tape. If two screws look close, treat them as different until the photo and position prove otherwise. A 2 mm difference can matter on a laptop post.
What is the best way to label laptop screws?
The best way is short handwritten labels on tape, matched with a phone photo. Name each container by the part it came from, such as “fan,” “hinge,” or “bottom cover.” Avoid vague labels like “small screws.” A label that names the location is easier to trust during reassembly than one that only describes the hardware.
How do i avoid mixing up internal parts during repair?
Keep each bracket, shield, or clip with the screw group that held it, and store it flat in its own labeled space. Take photos before and after removal so orientation stays clear. If a part looks nearly identical to another one, do not rely on memory. The photo, label, and separate tray should all agree before you move on.
Drafted with AI; not yet reviewed by a person.