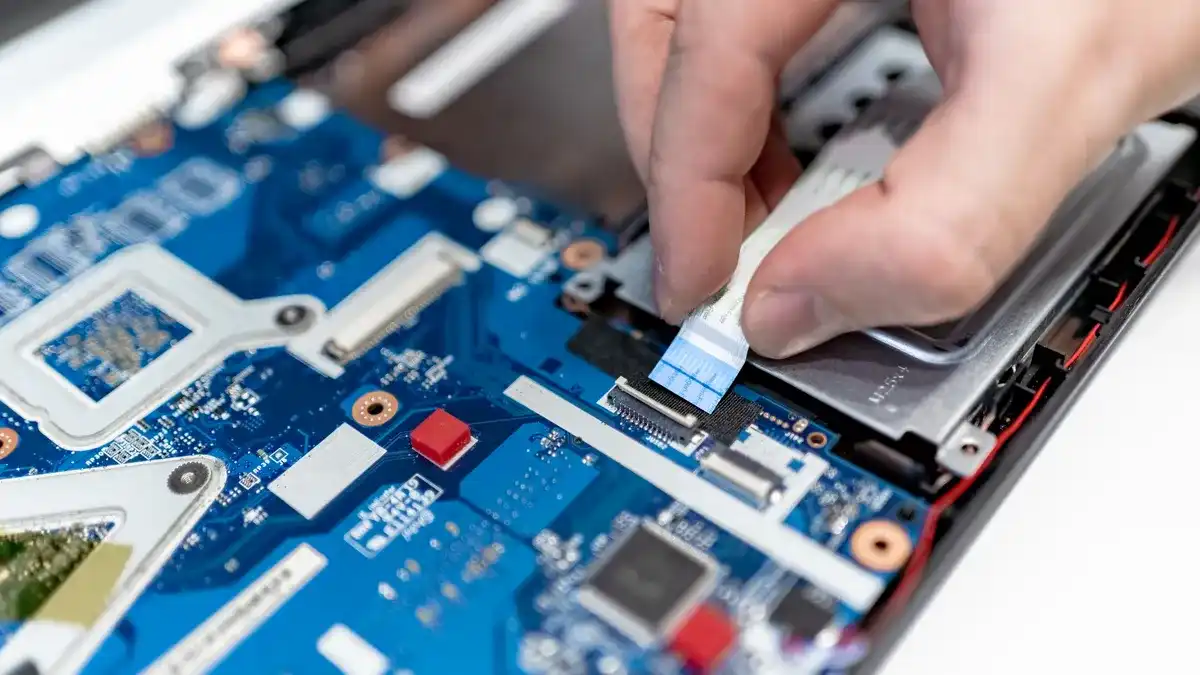
Last updated: November 06, 2026
Quick Answer
In short: the safest laptop repair setup usually holds the machine flat, supports the motherboard or lid without flex, and blocks the two damage modes that ruin jobs fast — ESD and mechanical stress. If the laptop shifts, twists, or sinks into the bench while you work, the repair becomes harder and the chance of cracked plastics, torn connectors, or lifted pads goes up.
Key Takeaways
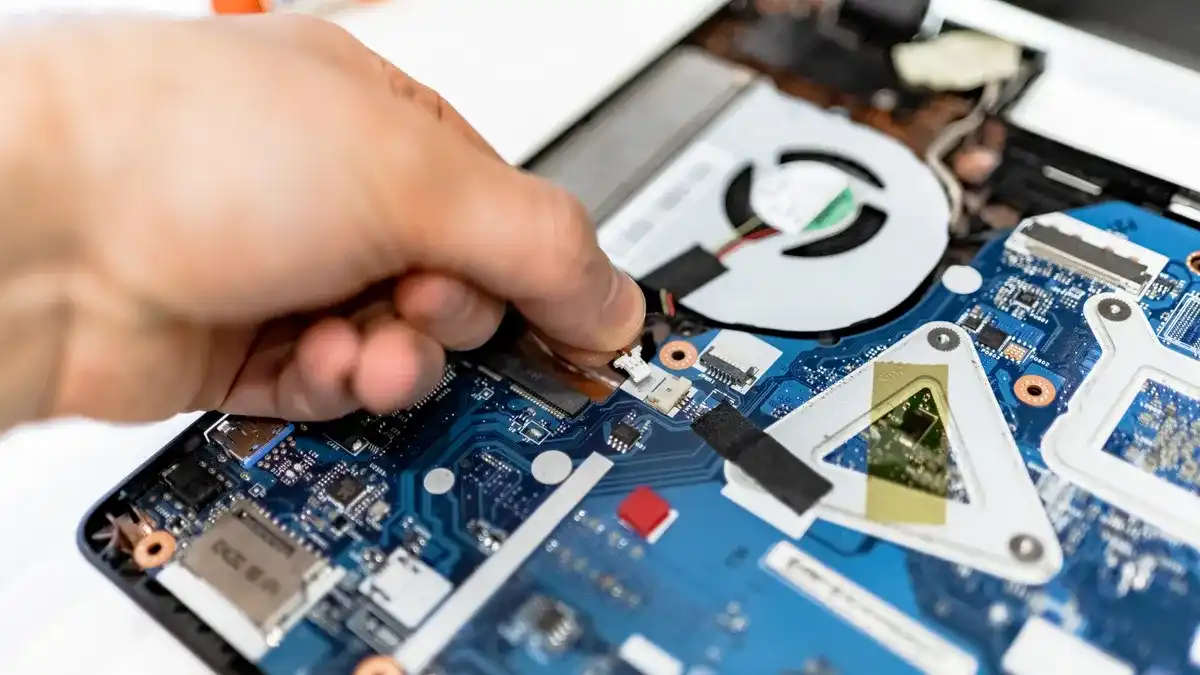
- Good laptop workholding keeps the device supported at the edges, with only the serviced area exposed and the rest stress-free.
- ESD protection and mechanical protection each reduce different risks; both are needed.
- Support the laptop base near the corners, lift only the needed section, and avoid side load on the motherboard or port edge.
- The display assembly needs restraint, not force, because the lid, hinges, antenna cables, and webcam harness move differently.
Laptop repair workholding and protection is the difference between a controlled repair and a costly accident. The topic here is Laptop repair workholding and protection — The Complete Guide, and it keeps the board, display assembly, or lower case stable at the moment you unplug a ribbon cable, lift a shield, reball a connector, or press a battery adhesive tab. A bad setup lets the chassis bow, the board bounce, or a metal tool touch the wrong point. That is why the right fixture, mat, clamp, and shielding matter as much as the screwdriver.
What good laptop workholding actually looks like
Good laptop workholding keeps the device supported at the edges, with the area you are servicing exposed and the rest of the assembly left stress-free. The key here is the contact pattern — notice how the support touches solid frame points instead of pressing on the center of a thin palmrest or display lid. This is what separates a safe setup from one that quietly warps the machine.
Because of that, a simple rule helps: support the chassis where the manufacturer designed it to carry load, not where it is easiest to grab. On most 13- to 17-inch laptops, that means the outer frame, hinge blocks, or underside perimeter. A common mistake is clamping over the middle of the base shell, where a 1 to 2 mm deflection can make a connector harder to remove and can stress solder joints around USB-C ports and edge-mounted sockets.
Here is the visual test I would use before a single screw comes out; if the setup is unfamiliar or the housing is already damaged, consult a professional and check the service documentation for the model:
| Setup element | Correct look | Incorrect look | Why it matters |
|---|---|---|---|
| Base support | Flat, even contact at the perimeter | Middle of the case hanging in the air | Prevents flex at the board and ports |
| Display support | Lid opened only as far as needed, then held | Screen left to flop open or slam shut | Protects hinges and antenna cables |
| Board access | Board level and still when lifted | Board twisting when a connector is moved | Reduces pad lift and cracked traces |
| Tool clearance | Enough room for a screwdriver to enter straight | Tool angled and scraping plastic | Lowers chance of stripped heads and gouges |
Therefore, the fix is usually not expensive. A dense ESD mat, a pair of foam blocks, and a small board holder are enough for many repairs. What matters more than brand is the shape of the support and the control it gives you. For example, a 10 mm foam riser under a lower case edge is often better than a hard clamp under the middle of a shell.
However, not every job needs full fixturing. A simple RAM replacement is not the same as a USB-C port replacement on a board with shields and fine-pitch parts. The latter needs rigid support and a clean path for hot air, tweezers, and inspection.
Which protection layer stops the most damage first?
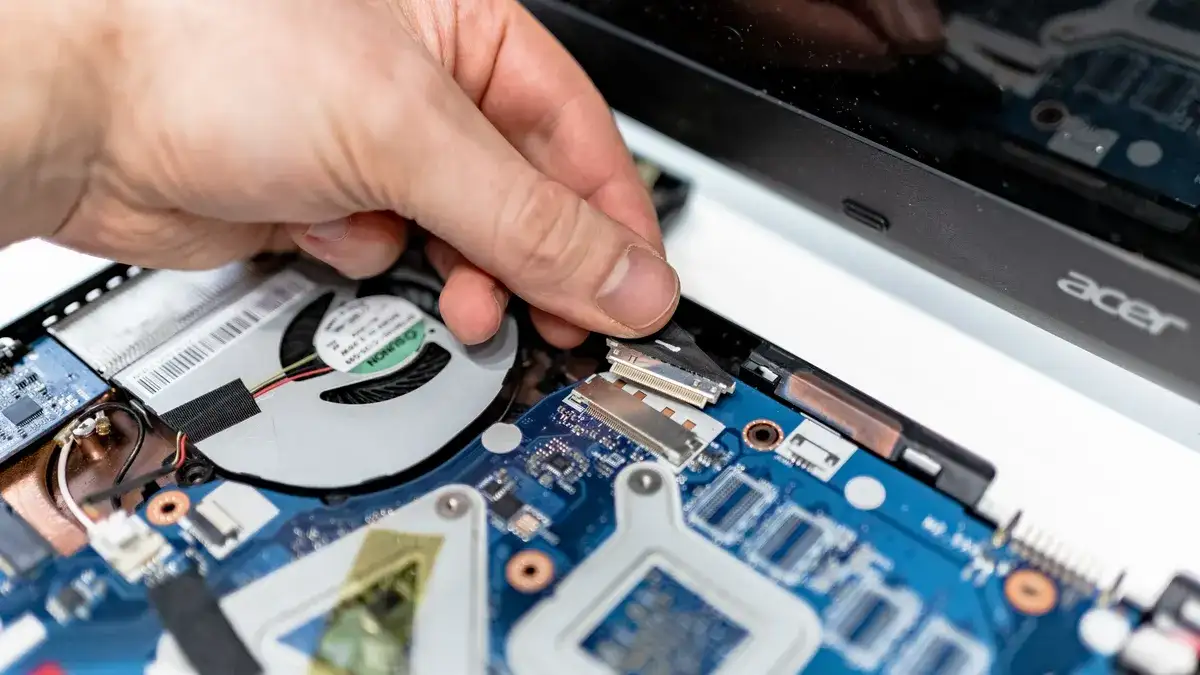
ESD protection and mechanical protection address different failure modes, so both matter. The first layer is grounding and dissipative surfaces, because a single static discharge can kill a controller even when the laptop still powers on afterward. The second layer is padding and barriers, because scratches, dents, and connector strain are often caused by bad contact points rather than bad tools.
Specifically, a complete protection stack usually starts with an antistatic mat connected to a known-good ground point, then adds a wrist strap, then uses insulating covers only where needed. If the job involves a bare board, use a dissipative surface rated for electronics work rather than a kitchen towel or cardboard. A generic cloth can trap charge, shed fibers, and let screws roll into the wrong place.
Use this order of protection when setting up the bench:
- Place an ESD mat on a stable bench. Check that it lies flat and does not curl at the edges. Do not work on bare laminate, carpet, or polished wood.
- Connect the mat to an approved ground point through the manufacturer’s cord or resistance lead. Check continuity with a meter if the setup is new. Do not clip to random pipes or power grounds you have not verified.
- Wear a wrist strap if you are handling a motherboard, SSD, or display logic board. Check that the strap fits snugly against skin. Do not wear it over a sleeve.
- Keep the battery disconnected before board work when the model allows it. Check service documentation first. Do not assume every laptop uses the same connector location or removal order.
- Use nonconductive shims or foam supports to stop the chassis from wobbling. Check that they do not press on cables, coils, or the back of the display. Do not wedge anything under a heat pipe or fan blade.
- Store screws in a labeled tray or magnetic mat section. Check lengths as you remove them. Do not mix hinge screws with board screws; a 1 mm error can crack plastic bosses.
Overall, the honest trade-off is that antistatic gear does not fix bad handling. A grounded mat will not save a board if a metal spudger slips into a connector or if the case is forced open past its hinge stop. That is why protection is a system, not a single accessory.
Two authoritative references worth keeping nearby are the ESDA’s guidance on ESD control from the Electrostatic Discharge Association and the OSHA Electrical Safety standards page for workplace grounding and safe work practices. They are not laptop-specific, but the principles are directly relevant when you are handling exposed electronics.
How do you hold a laptop base safely during teardown?
You hold a laptop base safely by supporting the shell near the corners, lifting only the section you need, and preventing any side load on the motherboard or port edge. The safe setup usually takes under 5 minutes once the workspace is arranged, and it is the part of the job that saves the most time later.
Because a base shell is not just a box, it is a thin structural frame with fragile points: hinge mounts, speaker pockets, battery bays, and port cutouts. When the device is upside down, those points become the weak spots. A proper holder keeps the unit level enough that screws do not bind and connectors are not pulled sideways.
Before you start, follow this sequence:
- Power the laptop off completely and unplug the charger. Check that all indicators are dark before moving on. Do not rely on sleep mode.
- Position the closed laptop on the mat with the hinge away from your dominant hand. Check that the ports you need are reachable. Do not place the hinge edge where it can drop off the bench.
- Add two foam blocks or a book-ended support at the left and right edges. Check that the center of the base is not bearing the load. Do not support it under the fan grille or battery bulge.
- Open the base only as much as the teardown requires, usually 45 to 90 degrees for many models. Check that the display is not straining. Do not force the lid farther than its stop.
- Remove screws into a labeled tray by section. Check for different lengths, especially near the hinge and center bay. Do not assume all bottom-case screws are identical.
- Break the case seam with a plastic opening tool, then walk the tool around the perimeter. Check that the gap grows evenly. Do not jam the tool under one spot and twist.
- When the bottom cover lifts, support it with one hand while unplugging any cable such as a battery lead or speaker cable. Check that the cable has slack. Do not lift the cover as if it were hinged.
Next, the visual clue that the setup is right is simple: the chassis stays still when you touch a screw head. If the whole machine moves when you apply torque, the support is wrong. A proper fixture often uses 20 to 30 mm of clearance under the case edges and nothing under the fragile middle.
Who this method is not for: a warped shell, a crushed corner, or a cracked hinge mount may need case replacement before a delicate teardown. Forcing a damaged base onto a fixture can make the break worse.
The detail everyone gets wrong on screens, lids, and hinges
The display assembly needs restraint, not force, because the lid, hinges, antenna cables, and webcam harness all move differently. The most common mistake is treating the screen like a rigid panel when it is really a layered assembly with thin glass, adhesive, and flex cables that hate bending. If the model is unfamiliar or already damaged, consult a professional and verify the service documentation before applying force.
A lid should be supported so it cannot slam shut or torque sideways. If you are replacing a panel, remove the bezel or lid cover on a clean, level surface and keep the screen face protected by a soft, lint-free pad. If the job is a hinge repair, the display should be held in the exact angle where the hinge resists least, not shoved open to 180 degrees unless the model is designed for it.
Then the key visual detail is the cable path. Notice how a good repair setup leaves a smooth arc near the hinge, not a sharp crease. That is what helps prevent intermittent display dropouts after reassembly, and the exact routing should be checked against the service manual.
| Display-side risk | Correct handling | Incorrect handling | Typical consequence |
|---|---|---|---|
| LCD panel face | Protected by clean padding | Left face-down on a hard bench | Pressure marks, cracks, dust ingress |
| Hinge torque | Managed with both hands and stable support | One-handed twisting of the lid | Broken hinge mounts or stripped posts |
| Antenna leads | Routed with gentle slack | Pinched under a screw or hinge | Weak Wi‑Fi signal, intermittent faults |
| Webcam cable | Kept flat and away from sharp edges | Folded tightly at the corner | Camera failure or ribbon damage |
If the machine uses adhesive strips around the display or battery, soften the adhesive with controlled heat only if the model allows it. Around 50 to 70°C surface warmth is often used in electronics service for adhesive softening, but the exact limit depends on the part and manufacturer guidance. Too much heat can warp plastic and haze the panel.
Finally, a good hinge repair has no surprise snap at the end of travel. If the lid drops from 120 degrees to 0 degrees with little resistance, the hinge is too loose. If it jerks in steps, the hinge may be binding or the mount may be cracked. Both faults deserve correction before the laptop goes back into service.
Which tools actually belong on a laptop repair bench?
The right tools are the ones that control force, orientation, and contamination; the rest are clutter. A laptop bench does not need a drawer full of specialty gadgets, but it does need a few accurate tools with predictable behavior.
Here is a practical bench list:
| Tool | Purpose | Good specification | Common mistake |
|---|---|---|---|
| ESD mat | Dissipates charge and gives a clean work surface | Large enough for laptop plus parts, with ground lead | Small mat that leaves screws on bare bench |
| Wrist strap | Equalizes charge between you and the work | Snug fit, tested lead, skin contact | Loose strap worn over clothing |
| Plastic opening picks | Separates clips without marring plastic | Thin, firm, nonmetallic | Knife, screwdriver, or metal spatula |
| Magnetic parts tray | Keeps screws grouped by step | Labeled sections or separate cups | Piling all screws together |
| Tweezers | Handles connectors and tape | Fine, aligned tips | Bent tips that slip off cable latches |
| Torque screwdriver | Prevents over-tightening | Small-range driver appropriate to electronics | Using a large driver with too much force |
| Foam blocks or laptop stand | Supports base and display | Dense enough not to collapse | Soft packing foam that sinks under weight |
However, the biggest mistake is using a tool that adds uncontrolled force. A metal pry blade can work in the right hands, but it is the wrong choice near batteries, speaker wires, and board components. A plastic pick may seem slower, yet it is often the better tool because it gives feedback instead of suddenly releasing.
Therefore, use a torque screwdriver for visible precision where the screw size and material make it worthwhile, especially around hinge brackets and metal shields. Many small electronics screws do not need high torque; they need repeatability. The failure mode here is stripping a boss or cracking a molded post because the screw was “just a little tighter.”
When the bench is correct, you can place a removed screw beside the hole it came from and know immediately where it belongs. That level of organization is not extra polish. It is protection against the one mistake that turns a repair into a case swap.
How to protect the board while you work on the motherboard
You protect the motherboard by holding it flat, shielding nearby plastic from heat, and keeping every connector, screw, and tool in a controlled path. This matters most during SSD swaps, fan replacements, DC jack repair, and USB-C board work, where one slip can damage a part worth far more than the time spent setting up.
Because a motherboard is most vulnerable at three points: connector edges, soldered ports, and thin board corners, uneven lifting makes those areas flex first. The right support uses a foam nest, board stand, or cutout fixture that keeps the board level while leaving the target area exposed. Around port repairs, a heat shield made from aluminum foil or purpose-made insulation can protect nearby plastic from warm air, but it should never block airflow to the exact joint you are trying to heat.
Before the first soldering or connector move, use this sequence:
- Disconnect the internal power source if the service manual calls for it. Check that the board is dead before touching components. Do not assume the power button alone is enough.
- Lift the board only after noting cable paths and screw locations. Check for hidden screws under tape or thermal pads. Do not yank from one corner.
- Set the board into a support that matches its shape. Check that no component hangs in open air. Do not rest it on stacked loose parts.
- Protect adjacent plastics with heat shielding if using hot air. Check that the shield stays flat and clear of the nozzle. Do not let foil touch live points or fan blades.
- Use the right tip size or nozzle size for the job. Check that contact is centered and controlled. Do not use oversized heat or a blunt iron tip on a fine connector.
- Inspect the board before reassembly under bright light. Check for torn pads, lifted flex locks, and stray screws. Do not close the machine until every connector is seated and every insulating film is back in place.
So the observable sign of a good board setup is that the board sits still while the tool moves. If the board jumps when you insert tweezers or the connector slides away as you touch it, the support is too soft or too low.
A useful guideline is simple: if a repair requires force beyond a connector latch or a small fastener, stop and look again. Most board damage comes from working too fast around a board that was not properly held.
For higher-risk electrical work, an electronics service standard such as IPC guidance on handling and assembly is worth knowing by name even if you do not follow a formal certification process. It frames the same principle: control the environment first, then the component.
How do you protect the laptop from scratches, dents, and heat damage?
You protect the laptop from scratches, dents, and heat damage by controlling every surface that touches it and by keeping heat, metal edges, and loose debris away from finished parts. The right protection is not bulky padding everywhere; it is targeted protection exactly where the bench or tool can hurt the machine.
The outside of a laptop is vulnerable in places that look harmless. The corner by the charging port, the edge around the trackpad, the top case near the palm rest, and the plastic trim around the screen can all show marks from a careless tool. A single dropped screw can leave a chip. A hot air nozzle too close to a bezel can soften the finish in seconds.
Think in layers. The lower layer is the bench surface. The middle layer is the support. The upper layer is the cover or shield on the part you are not working on. For example, when cleaning fans, a sheet of clean paper or a thin cover over the keyboard area can stop falling dust from entering switches. When prying a case, a thin plastic shim under the opening tool can protect painted edges from scrapes.
Use this quick check before any aggressive step:
- Verify the area is clear of loose screws, cable clips, and dust.
- Place the part so the finished face is not touching metal.
- Shield adjacent trim with tape or nonconductive film if heat is nearby.
- Keep hot tools moving; do not park a nozzle or iron tip in one spot.
- Remove protection as soon as the step is finished so heat does not build under it.
- Inspect for marks under a bright lamp before moving to the next step.
Overall, the figure that matters here is distance: a hot air nozzle usually belongs several centimeters away from plastic, not kissing the edge of the bezel. The exact spacing changes with temperature and airflow, but “close enough to feel hot” is not a method.
This is also where cheap bench habits backfire. A towel under a laptop may feel gentle, but it hides screws, traps lint, and does nothing to stop static. A hard mat with deliberate padding at the touch points does more with less risk.
What should a complete laptop repair setup include?
A complete setup includes stable support, ESD control, screw organization, controlled lighting, and the discipline to stop when a support point looks wrong. The right setup is not a shopping list of expensive accessories; it is a workspace that removes variables before the repair starts.
So a practical setup can fit on one bench, but it should cover these zones:
| Zone | What belongs there | What should stay out |
|---|---|---|
| Work zone | Laptop, mat, tools in use | Food, drinks, loose wires |
| Parts zone | Screw tray, labeled bags, replacement parts | Unsorted hardware piles |
| Heat zone | Iron, hot air station, heat shield | Plastic cases, cables, adhesive strips |
| Clean zone | Microfiber cloth, air blower, inspection light | Solder dust, metal filings |
| Storage zone | Spare batteries, panels, brackets | Unprotected stacked boards |
The first thing I would add to almost any hobby bench is better light. A bright, neutral lamp with a focused beam makes connector locks, cracked solder joints, and screw lengths visible without guesswork. The second is a way to stop the machine from sliding. That can be an angled stand, foam edge blocks, or a proper service cradle.
Because a good setup also means knowing when not to proceed, a swollen case, a cracked hinge mount, or motherboard corrosion near the power circuit are signs to reassess the repair path before opening further. These are not problems a bench can solve by force.
For the reader who wants the shortest safe version, use this standard:
- grounded mat
- wrist strap for board work
- labeled screw storage
- plastic opening tools
- foam support blocks
- controlled lighting
- heat protection for adjacent plastics
That list is enough for many common repairs, from SSD upgrades to fan swaps. It is not enough for every solder-level job, and that is the point. A complete setup is not one that does everything; it is one that keeps each repair inside its safe range.
When should you stop and hand the job to a specialist?
You should stop and hand the job to a specialist when the repair needs board-level soldering, the chassis is structurally damaged, or the risk of making the fault worse is higher than the cost of the repair. That threshold is different for each laptop, but the warning signs are usually obvious.
A few situations deserve caution:
- The USB-C port is loose and the board pads are already torn.
- The battery is swollen, punctured, or stuck under heavy adhesion.
- The display panel is bonded to the lid with narrow adhesive and the replacement part is expensive.
- Liquid damage has reached corrosion on the motherboard.
- The hinge mount is cracked and the screw bosses are pulling out of the plastic.
- The machine needs micro soldering, not just connector replacement.
The most useful rule is this: if the repair requires both heat and force at the same time, the chance of collateral damage climbs fast. Heat softens plastic. Force breaks plastic. Together they can ruin a housing, a cable, or the board edge in a single mistake.
The honest limitation of workholding is that it cannot compensate for missing diagnostics. A securely held laptop with the wrong diagnosis still gets damaged if the wrong part is removed first. So the bench should support the repair, not rush it.
If a part will not move with the expected clip, screw, or adhesive release, pause. Check service documentation, verify hidden fasteners, and reassess the support. The correct answer is often to reduce force, not increase it.
FAQ
Do I need an ESD wrist strap for every laptop repair?
You need one for exposed board work, not for every simple external task. If you are only swapping RAM on a grounded mat or replacing a keyboard on a fully assembled machine, the risk is lower. If the motherboard is open, a wrist strap is the safer habit, especially around SSDs, ports, and exposed connectors.
Can I use a regular desk instead of an ESD mat?
You can, but it is a poor choice for board-level repair. A regular desk does nothing to dissipate charge, and some desk surfaces build static easily. An ESD mat is inexpensive compared with the cost of a damaged board or a failed rework job.
What is the safest way to keep screws organized?
Use a labeled parts tray or a segmented magnetic mat and separate screws by removal step. The safest method is the one that keeps hinge screws, board screws, and shield screws apart from the moment they leave the laptop. A mixed pile is the fastest route to stripped threads and cracked posts.
Is it safe to use metal tools near a laptop battery?
Only with care and only when the battery is disconnected or fully isolated according to the service procedure. Metal tools can short terminals or puncture soft cells if used carelessly. Plastic tools are safer for prying, while metal tools belong in controlled, visible work on fasteners or shields.
How much heat is too much near plastic parts?
If a plastic part is softening, whitening, warping, or smelling hot, the heat is already too much. For adhesive softening, many technicians work with controlled warmth rather than high nozzle temperatures, but the exact setting depends on the component and airflow. Keep the heat moving and shield nearby plastic whenever possible.
Drafted with AI; not yet reviewed by a person.