Last updated: November 06, 2026
Quick Answer: for Laptop Screw Handling and Fastener Management, one labeled system can keep 8 to 12 bottom-cover screws organized, but mixed-length jobs need photos and zone labels. In short: if you strip laptop screws, lose track of where they came from, or mix lengths during a repair, the fix is to sort fasteners before the first screw comes out and keep each group tied to its exact location until reassembly. That single habit, when used carefully and with the service manual or a qualified repair professional if needed, helps prevent cracked palm rests, punctured batteries, warped bottom covers, and the “one screw won’t seat” problem that turns a 20-minute job into an afternoon.
Key Takeaways
- Choose the right system based on screw pattern, fastener count, and disassembly depth.
- Use a one-way process: remove, record, separate, and never mix the next screw group.
- Length, thread type, and hidden hardware can change the fastener plan.
- If a screw is stripped, stuck, or missing, stop and reassess instead of forcing it.
Laptop screw handling is not about being neat for its own sake. It is about keeping 2 mm, 3 mm, and 4 mm screws from ending up in the wrong threaded boss, keeping Torx and Phillips heads from getting chewed up, and keeping captive screws, standoffs, washers, and shields in the order the chassis expects. If you repair ultrabooks, gaming laptops, business notebooks, or MacBooks, the same rule holds: fastener management is part of the repair, not a cleanup task after it.
What Actually Determines the Right Answer Here
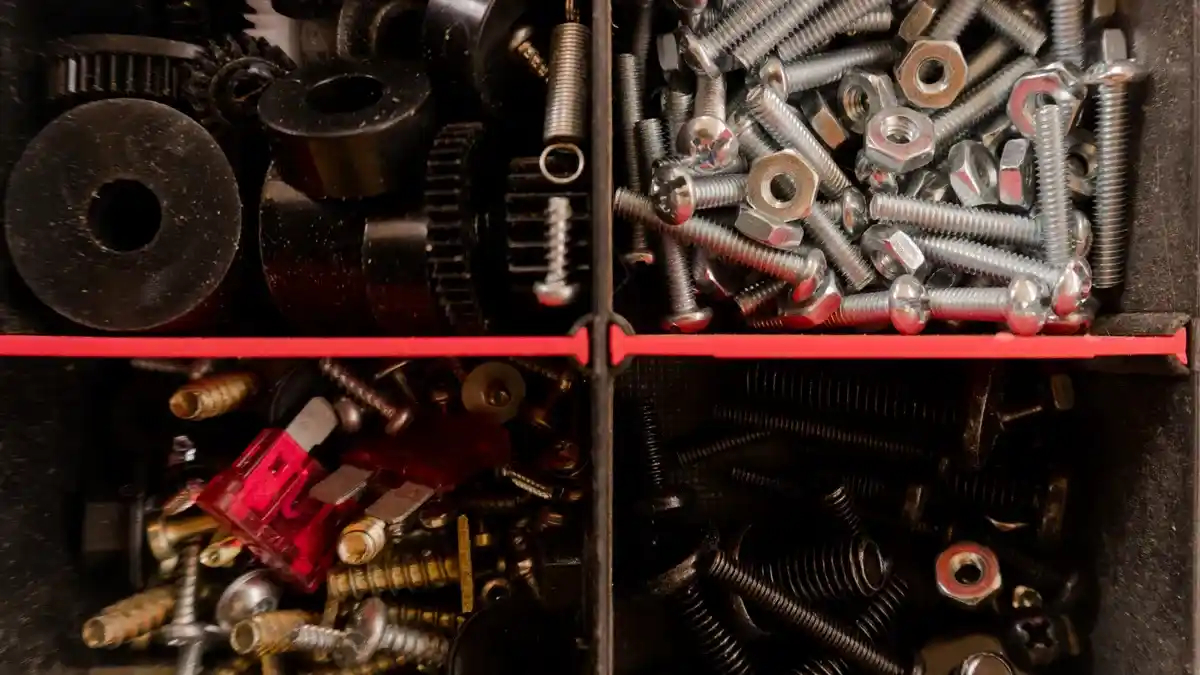
The right system depends on the screw pattern, the number of fastener types, and how far the machine has to come apart. If you are removing only a bottom cover with 8 to 12 screws, a labeled magnetic mat or a paper map may be enough. If you are opening a 15-inch laptop with a heat sink, hinge covers, SSD shield, speaker brackets, and a battery pack, then the answer flips: you need a location-based sorting method, not a generic tray.
The biggest mistake is treating all screws as interchangeable. They are not. A 3.0 mm screw that belongs in the hinge area can be too long for a keyboard frame. A self-tapping screw in a plastic boss can shred the hole if it is forced into a machine screw thread. Head style matters too: Phillips #00, Phillips #0, Torx T5, Torx T8, tri-point Y000, and pentalobe are not “close enough” substitutes. Mixing them is how drivers cam out and screw heads round off.
A good management system answers three questions at once:
- Where did this fastener come from?
- What type is it?
- In what order does it go back?
A $10 magnetic project mat, a compartmented parts tray, or even a sheet of cardboard can all work if the labels are exact, and iFixit’s teardown guides commonly use labeled part layouts for that reason. But if you have to remove more than one layer of hardware, use a map with zones. Mark the chassis outline and write each screw group directly on the surface. If your bench is crowded, use a second tray for non-screw hardware like clips and brackets so they do not vanish into the screw pile.
| Situation | Best Path | Why Other Options Fail |
|---|---|---|
| Bottom cover only, 8–12 screws | Labeled mat or cardboard map | A loose tray makes it easy to confuse screw lengths |
| Hinge, board, and battery removal | Zone-based sorting with separate cups | One mixed bin hides length differences |
| Stripped or partial-head screws | Precision driver set plus extraction plan | Forcing the wrong bit makes the damage worse |
| Plastic thread bosses | Return screws to exact original holes | A slightly longer screw can crack the boss |
| Mixed hardware from unknown prior repair | Photograph, measure, and sort before reassembly | Guessing by eye is how mistakes repeat |
Quick check: if you can name every screw’s original location before you put it back, your system is good enough; if not, you need better labeling before the next screw comes out.
How do you keep laptop screws organized during disassembly?
You keep laptop screws organized by creating a one-way path: remove one group, document it, isolate it, and do not mix it with the next group. If the laptop has 14 screws and 4 distinct lengths, the goal is not just storage; it is traceability.
Use a simple process. First, photograph each stage before removal. A phone picture with the screws still in place is often more useful than a clean glamour shot of the open chassis. Second, remove only one screw type at a time when possible. Third, place each group into a marked cell, cup, or taped zone. Fourth, write the driver type and approximate length beside it, such as “T5 3.1 mm” or “PH00 2.4 mm.” Fifth, keep shields, springs, and washers with the screw that holds them.
A spreadsheet is overkill for a single cover removal, but it is useful on larger jobs or when you are repairing several models in a row. A note app works too. What matters is consistency. If the same laptop model comes in again, you want a repeatable map instead of a memory test.
If you are dealing with a MacBook-style bottom case, remember that some screws have different lengths even when the head looks identical. That is why “put them in order from left to right” helps only when the pattern is obvious and the screws stay in sequence. For anything with multiple fastener depths, label the locations instead of relying on order alone.
- Clear the bench and place an ESD-safe mat or plain white paper under the laptop.
- Take one close photo of the full underside, then one photo per removed screw group.
- Choose a storage method: magnetic mat, pill organizer, compartment tray, or taped paper map.
- Remove a single fastener group and place it immediately into the matching zone.
- Write the location, driver type, and any washer or bracket note beside that zone.
- Repeat until the laptop is open, keeping each hardware set separate from the next.
- On reassembly, reverse the order and verify every screw seats by hand before using a driver.
Two tools make the job easier without much cost: a precision screwdriver set with bits like Phillips #000, Phillips #00, Torx T4, T5, and T6; and a magnetic parts mat or organizer with at least 20 small compartments. A digital caliper is useful if you want to measure screw length to the tenth of a millimeter, especially on mixed hardware.
Quick check: if you are removing more than one screw type, a photo plus a labeled zone beats any “I’ll remember where that went” system.
The three conditions that change everything

The correct fastener strategy changes when screw length, thread type, or hidden hardware enters the picture. If none of those are present, a simple tray is fine. If even one is present, the usual advice—“just keep them sorted”—is too vague to be useful.
1) Screw length differs by only a millimeter or two
If the screws are 2.5 mm and 3.5 mm versions of the same head, the difference looks tiny and still matters. A screw that is 1 mm too long can bottom out before the head clamps the part, or it can press into something below the surface. Use a caliper or a screw gauge card if the machine has shallow bosses or layered plastic.
2) The thread goes into plastic
If the screw bites into plastic, the risk is cross-threading and boss damage. In that case, do not power-drive the screw. Start every screw by hand for at least 2 to 3 full turns. If resistance appears early, back out and inspect the threads. A stripped boss often means the repair stops being a screw-management problem and becomes a plastic-repair problem.
3) There are captive screws or spring-loaded hardware
If the machine uses captive screws, they are meant to stay in the cover or bracket, not be removed from it. Force is the enemy here. Turn them until they loosen, but do not pry them free unless the design explicitly allows it. Spring-loaded screws, washers, and ground clips should be kept in their exact stack order. Reversing the stack can change pressure on the board or shell.
A useful rule is to treat screws with shoulders, washers, or ground paths as part of an assembly, not loose hardware; if you are unsure, consult the service manual or a qualified repair professional. That distinction helps prevent “why won’t this panel sit flat?” failures later.
Many technicians keep a reference notebook with the screw map for recurring models, especially business laptops from Dell Latitude, Lenovo ThinkPad, HP EliteBook, and Acer TravelMate lines. That habit pays off because the same model family often repeats patterns even when the exact chassis revision changes. Still, do not assume revision A and revision B share every screw.
Quick check: if you can say “these are all the same” without measuring or checking the thread, you are probably about to mix the wrong fasteners.
What to do if a screw is stripped, stuck, or missing
If a screw is stripped, stuck, or missing, stop trying to solve it with more force. The answer changes from organization to damage control, and the wrong move can turn a repairable problem into a broken board, cracked bezel, or mangled standoff.
Stripped screw heads usually happen for one of four reasons: the wrong bit, too much downward force, a worn driver, or previous damage. The first move is to seat the correct bit fully and press straight down. For tiny laptop hardware, that usually means a quality precision driver rather than a hardware-store bit. If the head is already rounded, a rubber band trick is unreliable on miniature screws and should not be your plan A.
If the screw is stuck, check whether threadlocker is present. Some manufacturers use a medium-strength threadlocker on hinge or chassis screws. A controlled amount of heat from a soldering iron tip touching the screw head for several seconds can help, but only if the surrounding plastic can tolerate it. Do not use open flame. Do not flood the area with oil unless you are prepared to clean the residue afterward, because oil can migrate onto boards and plastics.
If the screw is missing, stop guessing at size. Measure a known matching screw from the same assembly, compare the hole depth, and use the correct replacement class. A missing bottom-cover screw is one thing. A missing board-retaining screw or battery fastener is another. If you do not know what belongs there, consult the service manual for that model or a reliable teardown guide from a manufacturer or standards-oriented repair resource.
Do not reuse visibly chewed screws in critical locations. A rounded head in a cosmetic cover may be acceptable until replacement arrives. A rounded screw near the battery or hinge is not.
- Stop turning the damaged screw the moment the bit slips.
- Confirm the bit size and shape: Phillips, Torx, tri-point, or pentalobe.
- Clean the head and seat the driver fully with straight downward pressure.
- If heat is appropriate, apply brief, controlled heat only to the screw head.
- If the head is stripped beyond recovery, use a proper extraction method before forcing the part.
- Replace the screw with the correct length, thread, and head style before reassembly.
For safety and battery handling, follow manufacturer guidance and, when in doubt, consult a qualified repair professional. The U.S. Consumer Product Safety Commission and laptop manufacturer service documentation are better references than guesswork when a fastener is near a battery pack or structural joint.
Quick check: if the screw head is damaged or the screw will not start by hand, the fix is not “push harder”; it is to stop and reassess the hardware.
The tools that actually help, and the ones that are optional
The tools that actually help are a precision driver set, a parts organizer, a magnetized pickup tool, a caliper, and a fine-tip marker. Everything else is secondary. If your budget is tight, spend on driver quality before spending on fancy storage.
A solid driver set should cover common laptop bits: Phillips #000 and #00, Torx T3 through T8, pentalobe P2 if you work on Apple hardware, and tri-point Y000 for newer Apple internals and some small electronics. A driver with a bearing cap and a well-machined tip reduces cam-out and keeps the screw head usable. Cheap bits often fit loosely, which is how the damage begins.
For storage, choose what matches the job:
- Magnetic mat: useful for multi-step disassembly and visual mapping
- Compartmented organizer: best for small parts that should not touch
- Taped paper map: best when you need a cheap, disposable record
- Screw trays with labels: good for bench work, less good for transport
A magnetic mat is not always the best choice. It can be convenient, but it can also hide tiny springs under a pile of screws if you are careless. It is also not the right answer for every technician working near magnetic media concerns or delicate compass sensors in other devices on the same bench. For laptops alone, it is usually fine as long as the screws are kept in labeled zones.
A caliper is underrated. Measuring screw length to the nearest 0.1 mm helps when the service manual is vague or missing. A small steel ruler can work, but calipers reduce doubt. A thread pitch gauge is less commonly needed for laptop repairs because many fasteners are standard miniature machine screws, yet it becomes useful when replacement inventory is mixed.
The optional tools are the ones people buy first: giant screw kits, novelty magnetic bracelets, or huge all-in-one boxes with more filler than fit. A huge kit can help for inventory, but it also encourages the wrong behavior: “close enough” substitution.
Quick check: if your driver tips wobble in the screw head, your tool kit is causing the problem, not your technique.
Edge cases where the normal advice breaks down
These edge cases are where a generic “sort your screws” answer fails. If your job matches one of these, change the method before you start.
-
Situation: the laptop uses hidden screws under feet or stickers.
What changes: the disassembly order matters because adhesive hides a fastener you cannot replace casually.
What to do instead: warm the feet gently, lift with a plastic spudger, and keep each adhesive-backed part separate on release liner or wax paper. -
Situation: you are dealing with a water-damaged or corroded machine.
What changes: screws may seize, heads may crumble, and corrosion can contaminate your storage tray.
What to do instead: isolate suspect hardware in a separate cup, wear eye protection, and plan to replace fasteners instead of salvaging every one. -
Situation: the chassis has pre-installed captive screws in a bottom cover.
What changes: removal and retention are part of the design, and forcing the screw out can damage the cover.
What to do instead: loosen only to the stop point, document that the screw remains captive, and never pull against resistance. -
Situation: you are reassembling after someone else’s repair.
What changes: the original screw map may already be wrong.
What to do instead: measure everything, compare against the service manual, and treat mixed hardware as unknown until proven otherwise. -
Situation: a hinge area uses machine screws into metal inserts.
What changes: torque matters more than in the bottom cover, and a loose screw can cause repeat failure.
What to do instead: seat the screw fully by hand first, then tighten only until snug; if the insert spins, the chassis repair has moved beyond simple screw replacement. -
Situation: the repair involves the battery or board shield.
What changes: wrong hardware can create pressure points or electrical contact problems.
What to do instead: keep the original stack order, use only the specified screw length, and follow the model’s service documentation exactly.
Quick check: if any screw looks corroded, captive, hidden, or structurally important, stop using the casual tray-and-memory approach.
How to build a repeatable screw map for any laptop
A repeatable screw map lets you reassemble a laptop without guessing, even when the machine has 20 or more fasteners. If you work on multiple models, this matters more than a fancy organizer. The map is the memory.
Start with a blank sheet, a magnetic mat, or a silicone parts board with enough cells for the whole job. Sketch the chassis outline. Mark hinge side, port side, and front edge. As screws come out, place them in the map where they belonged, not where they are easiest to drop. If the laptop is complicated, divide the map into layers: bottom cover, internal shield, battery, board, cooling system, and hinge hardware.
Use abbreviations that are hard to misread:
- T5 = Torx T5
- PH00 = Phillips #00
- Y000 = tri-point Y000
- 2.8L = 2.8 mm long
- W = washer
- C = captive
That shorthand keeps your map compact and readable. If a screw has a spacer, note the stack order. For example: “T5 3.2L + washer + shield” is more useful than a bare screw count.
When reassembly starts, check the map against the empty chassis before a single screw goes back in. If a location shows a 3.0 mm screw and you have only a 4.0 mm screw in hand, stop. Do not “see if it fits.” That is how threads strip and shells crack.
A good map also records anomalies. If one hole was already damaged, mark it. If one screw had threadlocker, mark that too. If a bracket was bent, note its orientation. A map that records only the ideal case becomes less useful the moment reality intrudes.
For long-term work, keep a folder of model notes. A few lines per machine are enough: screw types, tricky zones, and any part that needs a specific order. A business laptop you service a second time should feel familiar, not mysterious.
Quick check: if you could hand your map to someone else and have them reassemble the laptop without asking five questions, the map is doing its job.
When the standard advice is wrong
The standard advice is wrong when the laptop has too many screw variants, too much hidden hardware, or too much prior damage for simple sorting to work. If you are on a bare bottom-cover job, a tray is fine. If you are inside a thin-and-light machine with stacked shields and mixed lengths, “keep them separate” is not enough.
The wrong advice says any container works. In reality, some containers make things worse. A deep bowl encourages pileups, which hide tiny washers and standoffs. A magnetic dish is fine for one group of identical screws, but it is poor for a mixed teardown because the screws can cling together and make visual sorting harder. A baggie is even worse during a repair because it turns traceability into a dump-and-hope system.
The wrong advice also says screw length errors are minor. They are not. On a laptop, a screw that is only a little too long can interfere with a battery pack, a board shield, or the bottom shell. On a plastic boss, it can split the mount. On a hinge, it can alter alignment enough to cause repeat failure.
Another common mistake is assuming replacements are universal. Laptop screws are not “M2-ish” in the way many people mean it. Even when the diameter is similar, head profile, thread pitch, length, and underside shape can differ. Use the original part when possible. If replacement is necessary, match the full specification, not just the diameter.
This is also where a repair should stop becoming a guess. If the machine is expensive, still under warranty, or structurally damaged around the fastener points, the most honest move is to consult the service manual, the manufacturer, or a qualified repair shop. That is not failure. It is a better outcome than forcing mismatched hardware into a frame that has already started to fail.
Quick check: if your plan depends on “probably close enough,” the standard advice is already wrong for your case.
FAQ
How do I know which screw goes where in a laptop?
You match each screw to its original hole by length, head type, and location. The safest method is to photograph the machine before removal and place each screw in the same position on a labeled mat. If two screws look identical, measure them anyway; a 1 mm difference can matter.
Can I reuse laptop screws after removal?
Yes, if the threads and heads are undamaged and the screw still seats correctly by hand. Do not reuse a screw that is stripped, bent, corroded, or clearly thinned by wear. On battery, hinge, or board-retention points, replacing damaged hardware is the safer call.
Is a magnetic mat safe for laptop repairs?
Usually yes, for the screws themselves. The bigger risk is not magnetism; it is disorganization. A mat works well if you label each area clearly and keep small springs, washers, and shields in the correct stack order. It is less helpful if it becomes a pile.
What should I do if I lost one screw?
Measure a matching screw from the same assembly and compare it with the hole depth before buying a replacement. Do not use a random screw from a mixed kit unless the length, head style, and thread match the original. If the lost screw secured a structural or battery-related part, replace it properly before powering on the laptop.
Should I tighten laptop screws as much as possible?
No. Tighten them until snug, then stop. Over-tightening strips plastic bosses, distorts covers, and can crack threaded inserts. If a screw feels wrong before it seats, back it out and check the thread instead of forcing it.
The Verdict
The best way to handle laptop screws is to sort by location first, size second, and memory last. If the machine has only a few fasteners, a simple labeled system is enough. If it has mixed lengths, hidden hardware, or plastic threads, you need photos, labels, and a repeatable map before the first screw comes out. That approach is slower for the first 5 minutes and faster for the rest of the repair.
This is not a job for improvisation when the screw matters structurally. It is also not worth overengineering on a simple bottom-cover removal. Use the lightest method that still lets you prove where every fastener belongs. That balance keeps the chassis intact, keeps the heads usable, and keeps the reassembly from turning into a second repair.
Drafted with AI; not yet reviewed by a person.